| Links zum Surfen: Links zum Surfen: |
|
|
|
| How to create a smilie set:
How to create a smilie set: |
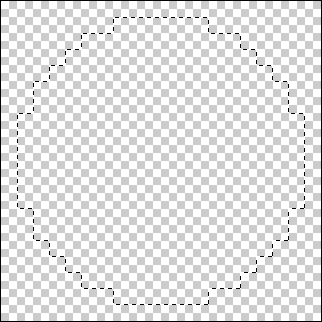
- Start a brand new project and zoom in to the maximum 1600% scale so
we can see what we’re working with and select the Elliptical Marquee
Tool, hold shift and drag a small circle onto your canvas. Try and
leave at least 1 pixel free for the outsides, like so:

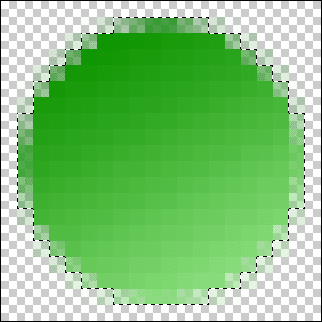
- Alot of people use a soft yellow colour for smilies, but just to be
different we’re going to go with a lime-green colour scheme for this
tutorial. Take your Gradient Tool (Hotkey: G) and apply the following
colours to your palette (#A8F099 and #0E9400).

- Check that you have the following settings with your Gradient Tool
first, then drag your mouse from one corner of the canvas to the other.

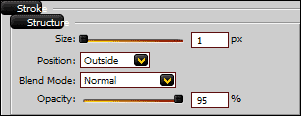
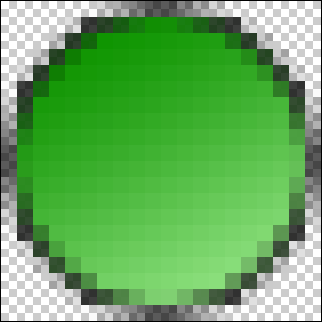
- We’re now going to apply an outline around the outside. First press
CTRL + J to duplicate the layer, followed by going to Layer > Layer
Styles > Blending Options… and navigate to the Stroke category neat
the bottom of the menu and apply these settings.
- Now use the Lasso Tool (Hotkey: L) to manually draw a “grin” shape
around the bottom of your smilie (if you miss a pixel or two, just hold
shift and hightlight that area to add it to the current selection).
Once you have done that, duplicate the layer again (CTRL + J) and fill
with a pure white.
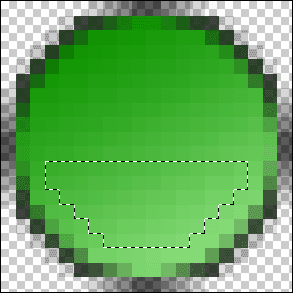
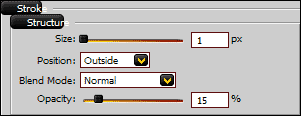
- Next we want to reduce the blackness around the mouth area on the
newest layer so navigate back to the Blending Options > Stroke
settings category and reduce the Opacity to around 15%.

- And now we can finish off with the eyes (with happen to be the
easiest part). Simply select your Brush Tool (Hotkey: B) with a black
colour and draw two straight lines down the centre (or slightly at an
angle for a different perspective) of the face for the eyes.

- And you’re done! Just save your work in .gif format with the
Transparency option ticked and your brand new forum smilie is ready!
Why not experiment to see what kind of unique forum smilies you can
come up with? Good luck!

|
|
|

